lm_sensors (Linux monitoring sensors) is a free and open-source application that provides tools and drivers for monitoring temperatures, voltage, and fans. This document explains how to install, configure, and use lm_sensors.
A. Enable Temperature using lm_sensors
1. Download rpm lm_sensors if you using offline
For Rhel6/Centos6 Download rpm lm_sensors-3.1.1-17.el6.x86_64.rpm then copy to server
# wget http://mirror.centos.org/centos/6/os/x86_64/Packages/lm_sensors-3.1.1-17.el6.x86_64.rpm
For Rhel7/Centos7 Download lm_sensors-libs-3.4.0-4.20160601gitf9185e5.el7.x86_64.rpm, lm_sensors-3.4.0-4.20160601gitf9185e5.el7.x86_64.rpm
# wget http://mirror.centos.org/centos/7/os/x86_64/Packages/lm_sensors-libs-3.4.0-4.20160601gitf9185e5.el7.x86_64.rpm
# wget https://www.rpmfind.net/linux/centos/7.4.1708/os/x86_64/Packages/lm_sensors-3.4.0-4.20160601gitf9185e5.el7.x86_64.rpm
2. Installation
Offline Installation
Install patch for Rhel6.x/Centos6
# rpm -ivh lm_sensors-3.1.1-17.el6.x86_64.rpm
Install patch for Rhel7/Centos7
# rpm -qa | grep -i 'lm_sensors'
lm_sensors-libs-3.3.4-11.el7.x86_64
#
# rpm --nodeps -e lm_sensors-libs-3.3.4-11.el7.x86_64
# rpm -ivh lm_sensors-libs-3.4.0-4.20160601gitf9185e5.el7.x86_64.rpm lm_sensors-3.4.0-4.20160601gitf9185e5.el7.x86_64.rpm
Online Installation
# yum -y lm_sensors
or
# apt-get lm-sensors
3. Configuration
# sensors-detect
Do you want to scan for them? This is totally safe. (YES/no): YES
Do you want to scan for Super I/O sensors? (YES/no): YES
Do you want to scan for IPMI interfaces? (YES/no): YES
ISA slots! Do you want to scan the ISA I/O ports? (YES/no): YES
Do you want to probe the I2C/SMBus adapters now? (YES/no): YES
Do you want to scan it? (YES/no/selectively): YES
Just press ENTER to continue:
Do you want to overwrite /etc/sysconfig/lm_sensors? (YES/no): YES
4. get the temperature information
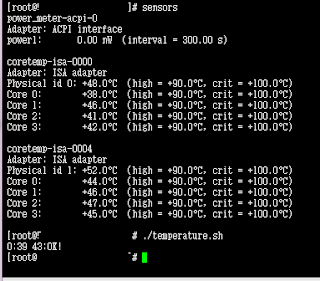
# sensors
power_meter-acpi-0
Adapter: ACPI interface
power1: 0.00 nW (interval = 300.00 s)
coretemp-isa-0000
Adapter: ISA adapter
Physical id 0: +40.0°C (high = +90.0°C, crit = +100.0°C)
Core 0: +34.0°C (high = +90.0°C, crit = +100.0°C)
Core 1: +32.0°C (high = +90.0°C, crit = +100.0°C)
Core 2: +34.0°C (high = +90.0°C, crit = +100.0°C)
Core 3: +35.0°C (high = +90.0°C, crit = +100.0°C)
coretemp-isa-0004
Adapter: ISA adapter
Physical id 1: +43.0°C (high = +90.0°C, crit = +100.0°C)
Core 0: +36.0°C (high = +90.0°C, crit = +100.0°C)
Core 1: +36.0°C (high = +90.0°C, crit = +100.0°C)
Core 2: +37.0°C (high = +90.0°C, crit = +100.0°C)
Core 3: +34.0°C (high = +90.0°C, crit = +100.0°C)
#
5. Create script temperature.sh for resume for example
#!/bin/bash
data=$(sensors | grep 'Core 0:' | awk '{print $3}' | cut -c2-3)
echo "0:"$data":OK!"
sample
[root@labs]# more temperature.sh
#!/bin/bash
data=$(sensors | grep 'Core 0:' | awk '{print $3}' | cut -c2-3)
echo "0:"$data":OK!"
[root@labs]#
[root@labs]# ./temperature.sh
0:39 43:OK!
[root@labs]#
B. Monitor to NMS
1. Create user SSH Create User access SSH on Linux (user: teguht , password: teguhthebat)
# useradd teguht
# passwd teguht
Sample log
[root@Lab ~]# useradd teguht
[root@Lab ~]# passwd teguht
Changing password for user teguht.
New password:
Retype new password:
passwd: all authentication tokens updated successfully.
[root@Lab ~]#
2. Monitoring to NMS example PRTG
Create directory /var/prtg/scripts every device
# cd /var
# mkdir prtg
# cd prtg
# mkdir scripts
# cd scripts
Create script temperature.sh on directory /var/prtg/scripts
# cd /var/prtg/scripts
#!/bin/bash
data=$(sensors | grep 'Core 0:' | awk '{print $3}' | cut -c2-3)
echo "0:"$data":OK!"
#
sample
[root@labs]# more temperature.sh
#!/bin/bash
data=$(sensors | grep 'Core 0:' | awk '{print $3}' | cut -c2-3)
echo "0:"$data":OK!"
[root@labs]#
[root@labs]# ./temperature.sh
0:39 43:OK!
[root@labs]#
3. Make it executable
# chmod +x temperature.sh
# modprobe coretemp
4. Add sensor/measurement to device
Go to prtg, fill to below and save
Add Sensor = SSH Script
Choose script = temperature.sh
Unit String = Celsius
User Credential : teguht
Password = teguhthebat
5. if you want to remove
# yum -y remove lm_sensors
Tutorial


No comments:
Post a Comment